Trade Portal: Difference between revisions
>Abcboy mNo edit summary |
FloofyPlasma (talk | contribs) |
||
| (59 intermediate revisions by 16 users not shown) | |||
| Line 10: | Line 10: | ||
:''"Trade with the universe."'' | :''"Trade with the universe."'' | ||
A '''trade portal''' is an object where many [[ | A '''trade portal''' is an object where many [[item]]s can be bought and sold in exchange for [[currency]]. Prices reflect demand, with higher amounts of local influence and smaller amounts of universal influence on prices. They were introduced in [[Game updates/20140402|version 1.5]]. | ||
At any given moment at a given trade portal, items will sell there for | At any given moment at a given trade portal, items will sell there for 25% or 1/4th of the buying price at the same portal at that moment. As prices change and vary between trade portals, there can be trade portals with vastly different prices, allowing a profit to be made. Prices also change over time, so a price may go up or down as time passes. Buying items raises prices while selling items lowers prices. | ||
==Appearance== | ==Appearance== | ||
| Line 23: | Line 23: | ||
{{Craft | {{Craft | ||
|Output=Trade Portal | |Output=Trade Portal | ||
|Level=1 | |||
|Bench=Portal | |Bench=Portal | ||
|Name1=Portal | |Name1=Portal | ||
| Line 36: | Line 37: | ||
==Upgrades== | ==Upgrades== | ||
To buy more advanced items, a trade portal must be upgraded. | To buy more advanced items, a trade portal must be upgraded. Prior to [[Game updates/20141119|version 1.6]] and the introduction of [[Platinum Coin|platinum coins]], the level 5 and level 6 upgrades cost 100 and 200 gold coins instead of 1 and 10 platinum coins, respectively. Upgrading in expert mode uses [[Trade_Portal#Expert_Mode|a different chart]]. | ||
{{Bench|header}} | {{Bench|header}} | ||
{{Bench|up|2|Trade more advanced stuff.|1|Amethyst|10|Gold Coin|10|Time Crystal|image1=Trade Portal up Icon.png|Time2=0}} | {{Bench|up|2|Trade more advanced stuff.|1|Amethyst|10|Gold Coin|10|Time Crystal|image1=Trade Portal up Icon.png|Time2=0}} | ||
{{Bench|up|3|Trade more advanced stuff.|1|Sapphire|20|Gold Coin|20|Time Crystal|image1=Trade Portal up Icon.png|Time2=0}} | {{Bench|up|3|Trade more advanced stuff.|1|Sapphire|20|Gold Coin|20|Time Crystal|image1=Trade Portal up Icon.png|Time2=0}} | ||
{{Bench|up|4|Trade more advanced stuff.|1|Emerald|50|Gold Coin|50|Time Crystal|image1=Trade Portal up Icon.png|Time2=0}} | {{Bench|up|4|Trade more advanced stuff.|1|Emerald|50|Gold Coin|50|Time Crystal|image1=Trade Portal up Icon.png|Time2=0}} | ||
{{Bench|up|5|Trade more advanced stuff.|1|Ruby| | {{Bench|up|5|Trade more advanced stuff.|1|Ruby|1|Platinum Coin|100|Time Crystal|image1=Trade Portal up Icon.png|Time2=0}} | ||
{{Bench|up|6|Trade more advanced stuff.|1|Diamond| | {{Bench|up|6|Trade more advanced stuff.|1|Diamond|10|Platinum Coin|200|Time Crystal|image1=Trade Portal up Icon.png|Time2=0}} | ||
|} | |} | ||
==Available Items== | ==Available Items== | ||
{{Cleanup | |||
| section = 4 | |||
| reason = This giant list of items slows down this page significantly.}} | |||
Most [[items]] are available through a trade portal. Other than those for [[Electricity|electric]] production and conversion, [[Crafting Surface|crafting surfaces]] are not. | Most [[items]] are available through a trade portal. Other than those for [[Electricity|electric]] production and conversion, [[Crafting Surface|crafting surfaces]] are not. | ||
Beginning with [[Game updates/20180314|version 1.7]], trade portals do not show items for buying or selling that have not yet been "found" (picked up by a blockhead). For worlds created before 1.7, only those items introduced in that version will be unavailable. Unavailable items have question marks instead of icons. | |||
{| class="wikitable" style="margin:auto; text-align:center;" id="Blocks" | {| class="wikitable" style="margin:auto; text-align:center;" id="Blocks" | ||
! Trade Portal Item Categories | ! Trade Portal Item Categories | ||
|- | |- | ||
| [[File:Stone Icon.png|40px|link=#Blocks|Blocks]][[File:Apple Icon.png|40px|link=#Food|Food]][[File:Pickaxe Stone Icon.png|40px|link=#Tools|Tools]][[File:Linen Shirt Icon.png|40px|link=# | | [[File:Stone Icon.png|40px|link=#Blocks|Blocks]][[File:Apple Icon.png|40px|link=#Food|Food]][[File:Pickaxe Stone Icon.png|40px|link=#Tools|Tools]][[File:Linen Shirt Icon.png|40px|link=#Clothing|Clothing]][[File:Iron Ore Icon.png|40px|link=#Mined Materials|Mined Materials]][[File:Basic Torch Icon.png|40px|link=#Miscellaneous|Miscellaneous]][[File:Rail Handcar Icon.png|40px|link=#Advanced Items|Advanced Items]][[File:Platinum Coin Icon.png|40px|link=#Coins|Coins]] | ||
|} | |} | ||
{{Trade|header}} | {{Trade|header}} | ||
| Line 75: | Line 80: | ||
{{Trade|Brick Column|2|p=Column}} | {{Trade|Brick Column|2|p=Column}} | ||
{{Trade|Brick Stairs|2|p=Stairs}} | {{Trade|Brick Stairs|2|p=Stairs}} | ||
{{Trade|Gravel|3}} | |||
{{Trade|Black Sand|3}} | {{Trade|Black Sand|3}} | ||
{{Trade|Compost|3}} | {{Trade|Compost|3}} | ||
{{Trade|Plaster|3}} | |||
{{Trade|Plaster Column|3|p=Column}} | |||
{{Trade|Plaster Stairs|3|p=Stairs}} | |||
{{Trade|Glass|3}} | {{Trade|Glass|3}} | ||
{{Trade|Glass Column|2|p=Column}} | |||
{{Trade|Glass Stairs|2|p=Stairs}} | |||
{{Trade|Black Glass|3}} | {{Trade|Black Glass|3}} | ||
{{Trade|Black Glass Column|2|p=Column}} | |||
{{Trade|Black Glass Stairs|2|p=Stairs}} | |||
{{Trade|Ice|3}} | {{Trade|Ice|3}} | ||
{{Trade|Ice Column|3|p=Column}} | {{Trade|Ice Column|3|p=Column}} | ||
| Line 110: | Line 123: | ||
{{Trade|Gold Column|6|p=Column}} | {{Trade|Gold Column|6|p=Column}} | ||
{{Trade|Gold Stairs|6|p=Stairs}} | {{Trade|Gold Stairs|6|p=Stairs}} | ||
{{Trade|Carbon Fiber Block|6}} | |||
{{Trade|Carbon Fiber Column|6|p=Column}} | |||
{{Trade|Carbon Fiber Stairs|6|p=Stairs}} | |||
{{Trade|Titanium Block|6}} | |||
{{Trade|Titanium Column|6|p=Column}} | |||
{{Trade|Titanium Stairs|6|p=Stairs}} | |||
{{Trade|Platinum Block|6}} | |||
{{Trade|Platinum Column|6|p=Column}} | |||
{{Trade|Platinum Stairs|6|p=Stairs}} | |||
{{Trade|Amethyst Block|6}} | |||
{{Trade|Amethyst Column|6|p=Column}} | |||
{{Trade|Amethyst Stairs|6|p=Stairs}} | |||
{{Trade|Sapphire Block|6}} | |||
{{Trade|Sapphire Column|6|p=Column}} | |||
{{Trade|Sapphire Stairs|6|p=Stairs}} | |||
{{Trade|Emerald Block|6}} | |||
{{Trade|Emerald Column|6|p=Column}} | |||
{{Trade|Emerald Stairs|6|p=Stairs}} | |||
{{Trade|Ruby Block|6}} | |||
{{Trade|Ruby Column|6|p=Column}} | |||
{{Trade|Ruby Stairs|6|p=Stairs}} | |||
{{Trade|Diamond Block|6|p=Diamond Block}} | |||
{{Trade|Diamond Column|6|p=Column}} | |||
{{Trade|Diamond Stairs|6|p=Stairs}} | |||
{{Trade|Luminous Plaster|6}} | |||
|} | |} | ||
| Line 115: | Line 153: | ||
! Trade Portal Item Categories | ! Trade Portal Item Categories | ||
|- | |- | ||
| [[File:Stone Icon.png|40px|link=#Blocks|Blocks]][[File:Apple Icon.png|40px|link=#Food|Food]][[File:Pickaxe Stone Icon.png|40px|link=#Tools|Tools]][[File:Linen Shirt Icon.png|40px|link=# | | [[File:Stone Icon.png|40px|link=#Blocks|Blocks]][[File:Apple Icon.png|40px|link=#Food|Food]][[File:Pickaxe Stone Icon.png|40px|link=#Tools|Tools]][[File:Linen Shirt Icon.png|40px|link=#Clothing|Clothing]][[File:Iron Ore Icon.png|40px|link=#Mined Materials|Mined Materials]][[File:Basic Torch Icon.png|40px|link=#Miscellaneous|Miscellaneous]][[File:Rail Handcar Icon.png|40px|link=#Advanced Items|Advanced Items]][[File:Platinum Coin Icon.png|40px|link=#Coins|Coins]] | ||
|} | |} | ||
{{Trade|header}} | {{Trade|header}} | ||
| Line 134: | Line 172: | ||
{{Trade|Cherry|2}} | {{Trade|Cherry|2}} | ||
{{Trade|Chilli|2}} | {{Trade|Chilli|2}} | ||
{{Trade|Wheat|2}} | |||
{{Trade|Tomato|2}} | |||
{{Trade|Kelp|3}} | {{Trade|Kelp|3}} | ||
{{Trade|Flax|3}} | {{Trade|Flax|3}} | ||
{{Trade|Vine|3}} | |||
{{Trade|Dodo Egg|3}} | {{Trade|Dodo Egg|3}} | ||
{{Trade|Dodo Feather|3}} | {{Trade|Dodo Feather|3}} | ||
| Line 143: | Line 184: | ||
{{Trade|Fur|4}} | {{Trade|Fur|4}} | ||
{{Trade|Coffee Cherry|4}} | {{Trade|Coffee Cherry|4}} | ||
{{Trade|Flour|4}} | |||
{{Trade|Yeast|4}} | |||
{{Trade|Salt|4}} | |||
{{Trade|Milk|4}} | |||
{{Trade|Yak Horn|4}} | |||
{{Trade|Yak Shavings|4}} | |||
{{Trade|Cooked Dodo Meat|5|p=Dodo Meat}} | {{Trade|Cooked Dodo Meat|5|p=Dodo Meat}} | ||
{{Trade|Cooked Fish|5|p=Fish (food)}} | {{Trade|Cooked Fish|5|p=Fish (food)}} | ||
{{Trade|Green Coffee Bean|5}} | {{Trade|Green Coffee Bean|5}} | ||
{{Trade|Dough|5}} | |||
{{Trade|Mozzarella|5}} | |||
{{Trade|Roasted Coffee Bean|6}} | {{Trade|Roasted Coffee Bean|6}} | ||
{{Trade|Coffee|6}} | {{Trade|Coffee|6}} | ||
| Line 151: | Line 200: | ||
{{Trade|Dodo Stew|6}} | {{Trade|Dodo Stew|6}} | ||
{{Trade|Poison|6}} | {{Trade|Poison|6}} | ||
{{Trade|Bread|6}} | |||
{{Trade|Flatbread|6}} | |||
{{Trade|Pizza|6}} | |||
{{Trade|Rainbow Essence|6}} | |||
{{Trade|Rainbow Cake|6}} | |||
|} | |} | ||
| Line 156: | Line 210: | ||
! Trade Portal Item Categories | ! Trade Portal Item Categories | ||
|- | |- | ||
| [[File:Stone Icon.png|40px|link=#Blocks|Blocks]][[File:Apple Icon.png|40px|link=#Food|Food]][[File:Pickaxe Stone Icon.png|40px|link=#Tools|Tools]][[File:Linen Shirt Icon.png|40px|link=# | | [[File:Stone Icon.png|40px|link=#Blocks|Blocks]][[File:Apple Icon.png|40px|link=#Food|Food]][[File:Pickaxe Stone Icon.png|40px|link=#Tools|Tools]][[File:Linen Shirt Icon.png|40px|link=#Clothing|Clothing]][[File:Iron Ore Icon.png|40px|link=#Mined Materials|Mined Materials]][[File:Basic Torch Icon.png|40px|link=#Miscellaneous|Miscellaneous]][[File:Rail Handcar Icon.png|40px|link=#Advanced Items|Advanced Items]][[File:Platinum Coin Icon.png|40px|link=#Coins|Coins]] | ||
|} | |} | ||
{{Trade|header}} | {{Trade|header}} | ||
| Line 167: | Line 221: | ||
{{Trade|Stone Axe|2|p=Axe|i=Axe Stone Icon.png}} | {{Trade|Stone Axe|2|p=Axe|i=Axe Stone Icon.png}} | ||
{{Trade|Stone Pickaxe|2|p=Pickaxe|i=Pickaxe Stone Icon.png}} | {{Trade|Stone Pickaxe|2|p=Pickaxe|i=Pickaxe Stone Icon.png}} | ||
{{Trade|Copper Bow & Arrows|3}} | {{Trade|Copper Bow & Arrows|3}} | ||
{{Trade|Tin Spade|3|p=Spade|i=Spade Tin Icon.png}} | {{Trade|Tin Spade|3|p=Spade|i=Spade Tin Icon.png}} | ||
| Line 173: | Line 226: | ||
{{Trade|Bronze Machete|3|p=Machete|i=Machete Bronze Icon.png}} | {{Trade|Bronze Machete|3|p=Machete|i=Machete Bronze Icon.png}} | ||
{{Trade|Bronze Sword|3|p=Sword|i=Sword Bronze Icon.png}} | {{Trade|Bronze Sword|3|p=Sword|i=Sword Bronze Icon.png}} | ||
{{Trade|Iron Pickaxe|4|p=Pickaxe|i=Pickaxe Iron Icon.png}} | {{Trade|Iron Pickaxe|4|p=Pickaxe|i=Pickaxe Iron Icon.png}} | ||
{{Trade|Iron Machete|4|p=Machete|i=Machete Iron Icon.png}} | {{Trade|Iron Machete|4|p=Machete|i=Machete Iron Icon.png}} | ||
{{Trade|Iron Sword|4|p=Sword|i=Sword Iron Icon.png}} | {{Trade|Iron Sword|4|p=Sword|i=Sword Iron Icon.png}} | ||
{{Trade|Iron Axe|4|p=Axe|i=Axe Iron Icon.png}} | {{Trade|Iron Axe|4|p=Axe|i=Axe Iron Icon.png}} | ||
{{Trade|Crowbar|5}} | {{Trade|Crowbar|5}} | ||
{{Trade|Steel Pickaxe|5|p=Pickaxe|i=Pickaxe Steel Icon.png}} | {{Trade|Steel Pickaxe|5|p=Pickaxe|i=Pickaxe Steel Icon.png}} | ||
{{Trade| | {{Trade|Razor|5}} | ||
{{Trade|Gold Spade|6|p=Spade|i=Spade Gold Icon.png}} | {{Trade|Gold Spade|6|p=Spade|i=Spade Gold Icon.png}} | ||
{{Trade|Gold Pickaxe|6|p=Pickaxe|i=Pickaxe Gold Icon.png}} | {{Trade|Gold Pickaxe|6|p=Pickaxe|i=Pickaxe Gold Icon.png}} | ||
{{Trade|Titanium Sword|4|p=Sword|i=Sword Titanium Icon.png}} | |||
{{Trade|Titanium Pickaxe|6|p=Pickaxe|i=Pickaxe Titanium Icon.png}} | |||
{{Trade|Gold Bow & Poison Arrows|6}} | {{Trade|Gold Bow & Poison Arrows|6}} | ||
|} | |} | ||
{| class="wikitable" style="margin:auto; text-align:center;" id=" | {| class="wikitable" style="margin:auto; text-align:center;" id="Clothing" | ||
! Trade Portal Item Categories | ! Trade Portal Item Categories | ||
|- | |- | ||
| [[File:Stone Icon.png|40px|link=#Blocks|Blocks]][[File:Apple Icon.png|40px|link=#Food|Food]][[File:Pickaxe Stone Icon.png|40px|link=#Tools|Tools]][[File:Linen Shirt Icon.png|40px|link=# | | [[File:Stone Icon.png|40px|link=#Blocks|Blocks]][[File:Apple Icon.png|40px|link=#Food|Food]][[File:Pickaxe Stone Icon.png|40px|link=#Tools|Tools]][[File:Linen Shirt Icon.png|40px|link=#Clothing|Clothing]][[File:Iron Ore Icon.png|40px|link=#Mined Materials|Mined Materials]][[File:Basic Torch Icon.png|40px|link=#Miscellaneous|Miscellaneous]][[File:Rail Handcar Icon.png|40px|link=#Advanced Items|Advanced Items]][[File:Platinum Coin Icon.png|40px|link=#Coins|Coins]] | ||
|} | |} | ||
{{Trade|header}} | {{Trade|header}} | ||
| Line 216: | Line 268: | ||
{{Trade|Ice Armor Leggings|6}} | {{Trade|Ice Armor Leggings|6}} | ||
{{Trade|Ice Boots|6}} | {{Trade|Ice Boots|6}} | ||
{{Trade|Carbon Fiber Helmet|6}} | |||
{{Trade|Carbon Fiber Chest Plate|6}} | |||
{{Trade|Carbon Fiber Leggings|6}} | |||
{{Trade|Carbon Fiber Boots|6}} | |||
{{Trade|Titanium Helmet|6}} | |||
{{Trade|Titanium Chest Plate|6}} | |||
{{Trade|Titanium Leggings|6}} | |||
{{Trade|Titanium Boots|6}} | |||
|} | |} | ||
| Line 221: | Line 281: | ||
! Trade Portal Item Categories | ! Trade Portal Item Categories | ||
|- | |- | ||
| [[File:Stone Icon.png|40px|link=#Blocks|Blocks]][[File:Apple Icon.png|40px|link=#Food|Food]][[File:Pickaxe Stone Icon.png|40px|link=#Tools|Tools]][[File:Linen Shirt Icon.png|40px|link=# | | [[File:Stone Icon.png|40px|link=#Blocks|Blocks]][[File:Apple Icon.png|40px|link=#Food|Food]][[File:Pickaxe Stone Icon.png|40px|link=#Tools|Tools]][[File:Linen Shirt Icon.png|40px|link=#Clothing|Clothing]][[File:Iron Ore Icon.png|40px|link=#Mined Materials|Mined Materials]][[File:Basic Torch Icon.png|40px|link=#Miscellaneous|Miscellaneous]][[File:Rail Handcar Icon.png|40px|link=#Advanced Items|Advanced Items]][[File:Platinum Coin Icon.png|40px|link=#Coins|Coins]] | ||
|} | |} | ||
{{Trade|header}} | {{Trade|header}} | ||
| Line 231: | Line 291: | ||
{{Trade|Tin Ore|2}} | {{Trade|Tin Ore|2}} | ||
{{Trade|Iron Ore|2}} | {{Trade|Iron Ore|2}} | ||
{{Trade|Amethyst Shard|2|p=Amethyst Shard}} | |||
{{Trade|Amethyst|2}} | {{Trade|Amethyst|2}} | ||
{{Trade|Gold Nugget|3}} | {{Trade|Gold Nugget|3}} | ||
{{Trade|Copper Ingot|3}} | {{Trade|Copper Ingot|3}} | ||
{{Trade|Tin Ingot|3}} | {{Trade|Tin Ingot|3}} | ||
{{Trade|Sapphire Shard|3|p=Sapphire Shard}} | |||
{{Trade|Sapphire|3}} | {{Trade|Sapphire|3}} | ||
{{Trade|Crushed Limestone|4}} | {{Trade|Crushed Limestone|4}} | ||
{{Trade|Pig Iron|4}} | {{Trade|Pig Iron|4}} | ||
{{Trade|Bronze Ingot|4}} | {{Trade|Bronze Ingot|4}} | ||
{{Trade|Emerald Shard|4|p=Emerald Shard}} | |||
{{Trade|Emerald|4}} | {{Trade|Emerald|4}} | ||
{{Trade|Platinum Nugget|5}} | |||
{{Trade|Titanium Ore|5}} | |||
{{Trade|Iron Ingot|5}} | {{Trade|Iron Ingot|5}} | ||
{{Trade|Ruby Shard|5|p=Ruby Shard}} | |||
{{Trade|Ruby|5}} | {{Trade|Ruby|5}} | ||
{{Trade|Steel Ingot|6}} | {{Trade|Steel Ingot|6}} | ||
| Line 247: | Line 313: | ||
{{Trade|Silicon Crystal|6}} | {{Trade|Silicon Crystal|6}} | ||
{{Trade|Silicon Wafer|6}} | {{Trade|Silicon Wafer|6}} | ||
{{Trade|Platinum Ingot|6}} | |||
{{Trade|Titanium Ingot|6}} | |||
{{Trade|Diamond Shard|6|p=Diamond Shard}} | |||
{{Trade|Diamond|6}} | {{Trade|Diamond|6}} | ||
|} | |} | ||
| Line 253: | Line 322: | ||
! Trade Portal Item Categories | ! Trade Portal Item Categories | ||
|- | |- | ||
| [[File:Stone Icon.png|40px|link=#Blocks|Blocks]][[File:Apple Icon.png|40px|link=#Food|Food]][[File:Pickaxe Stone Icon.png|40px|link=#Tools|Tools]][[File:Linen Shirt Icon.png|40px|link=# | | [[File:Stone Icon.png|40px|link=#Blocks|Blocks]][[File:Apple Icon.png|40px|link=#Food|Food]][[File:Pickaxe Stone Icon.png|40px|link=#Tools|Tools]][[File:Linen Shirt Icon.png|40px|link=#Clothing|Clothing]][[File:Iron Ore Icon.png|40px|link=#Mined Materials|Mined Materials]][[File:Basic Torch Icon.png|40px|link=#Miscellaneous|Miscellaneous]][[File:Rail Handcar Icon.png|40px|link=#Advanced Items|Advanced Items]][[File:Platinum Coin Icon.png|40px|link=#Coins|Coins]] | ||
|} | |} | ||
{{Trade|header}} | {{Trade|header}} | ||
| Line 268: | Line 337: | ||
{{Trade|Sign|2}} | {{Trade|Sign|2}} | ||
{{Trade|Wooden Bed|2}} | {{Trade|Wooden Bed|2}} | ||
{{Trade|Wooden Gate|2}} | |||
{{Trade|Soft Bed|3}} | {{Trade|Soft Bed|3}} | ||
{{Trade|String|3}} | {{Trade|String|3}} | ||
| Line 279: | Line 349: | ||
{{Trade|Tin Foil|3}} | {{Trade|Tin Foil|3}} | ||
{{Trade|Fishing Rod|3}} | {{Trade|Fishing Rod|3}} | ||
{{Trade|Cage|3}} | |||
{{Trade|Bucket Of Water|4}} | {{Trade|Bucket Of Water|4}} | ||
{{Trade|Steel Lantern|4}} | {{Trade|Steel Lantern|4}} | ||
| Line 292: | Line 363: | ||
{{Trade|Tyrian Purple|4}} | {{Trade|Tyrian Purple|4}} | ||
{{Trade|Copper Blue|4}} | {{Trade|Copper Blue|4}} | ||
{{Trade|Mirror|4}} | |||
{{Trade|Golden Chest|5}} | {{Trade|Golden Chest|5}} | ||
{{Trade|Feeder Chest|5}} | |||
{{Trade|Safe|5}} | {{Trade|Safe|5}} | ||
{{Trade|Iron Door|5}} | {{Trade|Iron Door|5}} | ||
| Line 306: | Line 379: | ||
{{Trade|Ruby Chandelier|6}} | {{Trade|Ruby Chandelier|6}} | ||
{{Trade|Diamond Chandelier|6}} | {{Trade|Diamond Chandelier|6}} | ||
|} | |} | ||
| Line 312: | Line 384: | ||
! Trade Portal Item Categories | ! Trade Portal Item Categories | ||
|- | |- | ||
| [[File:Stone Icon.png|40px|link=#Blocks|Blocks]][[File:Apple Icon.png|40px|link=#Food|Food]][[File:Pickaxe Stone Icon.png|40px|link=#Tools|Tools]][[File:Linen Shirt Icon.png|40px|link=# | | [[File:Stone Icon.png|40px|link=#Blocks|Blocks]][[File:Apple Icon.png|40px|link=#Food|Food]][[File:Pickaxe Stone Icon.png|40px|link=#Tools|Tools]][[File:Linen Shirt Icon.png|40px|link=#Clothing|Clothing]][[File:Iron Ore Icon.png|40px|link=#Mined Materials|Mined Materials]][[File:Basic Torch Icon.png|40px|link=#Miscellaneous|Miscellaneous]][[File:Rail Handcar Icon.png|40px|link=#Advanced Items|Advanced Items]][[File:Platinum Coin Icon.png|40px|link=#Coins|Coins]] | ||
|} | |} | ||
{{Trade|header}} | {{Trade|header}} | ||
| Line 331: | Line 403: | ||
{{Trade|Freight Car|6}} | {{Trade|Freight Car|6}} | ||
{{Trade|Passenger Car|6}} | {{Trade|Passenger Car|6}} | ||
{{Trade|Fuel|6}} | |||
{{Trade|Raw Resin|6}} | |||
{{Trade|Epoxy|6}} | |||
{{Trade|Carbon Fibers|6}} | |||
{{Trade|Carbon Fiber Sheet|6}} | |||
{{Trade|Carbon Fiber Wing|6}} | |||
{{Trade|Jetpack Chassis|6}} | |||
{{Trade|Jet Engine|6}} | |||
{{Trade|Jetpack|6}} | |||
|} | |} | ||
| Line 336: | Line 417: | ||
! Trade Portal Item Categories | ! Trade Portal Item Categories | ||
|- | |- | ||
| [[File:Stone Icon.png|40px|link=#Blocks|Blocks]][[File:Apple Icon.png|40px|link=#Food|Food]][[File:Pickaxe Stone Icon.png|40px|link=#Tools|Tools]][[File:Linen Shirt Icon.png|40px|link=# | | [[File:Stone Icon.png|40px|link=#Blocks|Blocks]][[File:Apple Icon.png|40px|link=#Food|Food]][[File:Pickaxe Stone Icon.png|40px|link=#Tools|Tools]][[File:Linen Shirt Icon.png|40px|link=#Clothing|Clothing]][[File:Iron Ore Icon.png|40px|link=#Mined Materials|Mined Materials]][[File:Basic Torch Icon.png|40px|link=#Miscellaneous|Miscellaneous]][[File:Rail Handcar Icon.png|40px|link=#Advanced Items|Advanced Items]][[File:Platinum Coin Icon.png|40px|link=#Coins|Coins]] | ||
|} | |} | ||
{| class="wikitable" | {| class="wikitable" | ||
! Icon !! Trade | ! Icon !! Trade | ||
|- | |- | ||
| [[File:Gold Coin Icon.png|25px]] || Trade 100 Copper Coins for 1 Gold Coin | | style="text-align:center;" | [[File:Platinum Coin Icon.png|25px]] || Trade 100 Gold Coins for 1 Platinum Coin | ||
|- | |||
| style="text-align:center;" | [[File:Gold Coin Icon.png|25px]] || Trade 1 Platinum Coin for 100 Gold Coins | |||
|- | |||
| style="text-align:center;" | [[File:Gold Coin Icon.png|25px]] || Trade 100 Copper Coins for 1 Gold Coin | |||
|- | |- | ||
| [[File:Copper Coin Icon.png|25px]] || Trade 1 Gold Coin for 100 Copper Coins | | style="text-align:center;" | [[File:Copper Coin Icon.png|25px]] || Trade 1 Gold Coin for 100 Copper Coins | ||
|} | |} | ||
| Line 349: | Line 434: | ||
It may be important to recognize that not all items can be bought or sold through a trade portal. These include: | It may be important to recognize that not all items can be bought or sold through a trade portal. These include: | ||
* Any [[Crafting Surface|crafting surface]] usable to make items | * Any [[Crafting Surface|crafting surface]] usable to make items | ||
* [[Portal]]s | * [[Portal]]s, trade portals, and [[Portal Chest|portal chest]]s | ||
* Any [[Dye Bench|dyed]] item | * Any [[Dye Bench|dyed]] item | ||
* [[Paint]] and [[Paint Stripper|paint stripper]] | * [[Paint]] and [[Paint Stripper|paint stripper]] | ||
* [[Painting]]s | * [[Painting]]s | ||
* [[Train Station|Train stations]] | * [[Train Station|Train stations]] | ||
* [[ | * [[Clothing#Reward Clothing|Reward clothing]] | ||
* [[Shark Jaw|Shark jaws]] | * [[Shark Jaw|Shark jaws]] | ||
* [[Tulip Seed|Tulip seeds]] and [[Tulip Bulb|bulbs]] | |||
* [[Time Crystal|Time crystals]] | * [[Time Crystal|Time crystals]] | ||
* [[Shop]]s | |||
===Removed Items=== | |||
On 13 October, 2015, the following items were removed from the trade portal and became unable to be purchased or sold. All of the items removed cost [[Time Crystal|time crystals]] to craft. | |||
{{Trade|header}} | |||
{{Trade|Amethyst Pickaxe|2|p=Pickaxe|i=Pickaxe Amethyst Icon.png}} | |||
{{Trade|Sapphire Pickaxe|3|p=Pickaxe|i=Pickaxe Sapphire Icon.png}} | |||
{{Trade|Emerald Pickaxe|4|p=Pickaxe|i=Pickaxe Emerald Icon.png}} | |||
{{Trade|Ruby Pickaxe|5|p=Pickaxe|i=Pickaxe Ruby Icon.png}} | |||
{{Trade|Diamond Pickaxe|6|p=Pickaxe|i=Pickaxe Diamond Icon.png}} | |||
{{Trade|Golden Bed|6}} | |||
|} | |||
At the same time, a notable change in prices was observed, making it more difficult to become wealthy via [[Crafting|manufacturing]]. | |||
==Blockmarket== | |||
[[File:Blockmarket.png|thumb|Website (August 2014)]] | |||
The Blockmarket website was opened to the public on 11 August 2014. The defunct website, located at <s>http://blockmarket.theblockheads.net</s>, rebuilt at https://wiki.floofyplasma.com/Blockmarket, shows the current global prices to buy an item in gold coins at trade portals. It also shows the percent change since 24 hours ago, being red if the price has gone down and green if the price has gone up. Clicking on an item's name shows a graph of the price for the last 24 hours. | |||
As described on their "What is this?" page: | |||
<blockquote>''"In The Blockheads, there are 'trade portals' which allow players to buy and sell most in-game items on a global marketplace. Every time a player buys an item, the global price rises a little, and every time they sell an item, the price falls. This website displays the current global prices for the in-game economy."''</blockquote> | |||
==Using== | ==Using== | ||
[[File:Trade Portal Interface.png|thumb|Interface | [[File:Trade Portal Interface 151 HD.png|thumb|Interface in HD]] | ||
[[File:Trade Portal Interface | [[File:Trade Portal Interface.png|thumb|Interface before version 1.5.1]] | ||
The trade portal has three options when tapped: Remove, Buy, and Sell. | The trade portal has three options when tapped: Remove, Buy, and Sell. Version 1.7 introduced [[Job Listings]]. | ||
A blockhead cannot buy, sell, or otherwise use the interface until they have reached the trade portal. At that time, the trade portal interface (shown to the right) will open. | A blockhead cannot buy, sell, or otherwise use the interface until they have reached the trade portal. At that time, the trade portal interface (shown to the right) will open. | ||
The icon menu across the top, immediately below the window title, can be scrolled left and right. Selecting an icon will display the trade menu associated with it: [[ | The icon menu across the top, immediately below the window title, can be scrolled left and right. Selecting an icon will display the trade menu associated with it: [[block]]s, [[food]], [[tool]]s, [[clothing]], [[Mining|mined]] materials, miscellaneous, advanced items, and [[Currency|coins]] (exchange). (See above for a detailed list.) The final icon is for upgrades. | ||
The trade menus can be scrolled up and down. Each line shows the item (and quantity), cost (in gold and copper coins), and a button to sell or buy based on what was chosen when the trade portal was tapped. The buy/sell button will be green if the using blockhead has the necessary items in its [[inventory]]. Items unavailable at the trade portal's current level show a "locked" icon and have no cost or buy/sell button. | The trade menus can be scrolled up and down. Each line shows the item (and quantity), cost (in platinum, gold and copper coins), and a button to sell or buy based on what was chosen when the trade portal was tapped. The buy/sell button will be green if the using blockhead has the necessary items in its [[inventory]]. Items unavailable at the trade portal's current level show a "locked" icon and have no cost or buy/sell button. | ||
Tapping a buy/sell button executes that exchange once but does not close the interface. To close the interface, tap outside its window. Transactions are instantaneous and cannot (or need to) be rushed by spending [[Time Crystal|time crystals]] or aborted. | Tapping a buy/sell button executes that exchange once but does not close the interface. To close the interface, tap outside its window. Transactions are instantaneous and cannot (or need to) be rushed by spending [[Time Crystal|time crystals]] or aborted. | ||
When buying, a blockhead | When buying items, a blockhead will automatically have coins exchanged to make the necessary purchase, with the remaining change being given back to that blockhead. When selling items, coins will not be exchanged automatically and may overflow out of a blockhead's inventory. | ||
The acts of buying and selling affect the listed prices for that item, although the results may not be visible until multiples of the item have been traded. Buying will cause a price increase, while selling will cause a price decrease. Items going for less than one copper coin each will be listed as multiples of the item, indicated by a number superimposed over its icon. Item listings can switch between singles and multiples as appropriate. The passage of time may also cause some prices to change | The acts of buying and selling affect the listed prices for that item, although the results may not be visible until multiples of the item have been traded. Buying will cause a price increase, while selling will cause a price decrease. Items going for less than one copper coin each will be listed as multiples of the item, indicated by a number superimposed over its icon. Item listings can switch between singles and multiples as appropriate. The passage of time may also cause some prices to change as other players buy and sell items. | ||
Beginning with [[Game updates/20140527|version 1.5.1]], an icon on each item line shows single or double arrowheads up or down or a horizontal line. These associate the listed price with an unspecified standard and indicate whether it is high, low, or normal. The arrowheads are green or red (green up for sell, green down for buy, so green indicates the price favors the player/blockhead). If tapped, a graph of the item's price over the past 24 hours will appear. | Beginning with [[Game updates/20140527|version 1.5.1]], an icon on each item line shows single or double arrowheads up or down or a horizontal line. These associate the listed price with an unspecified standard and indicate whether it is high, low, or normal. The arrowheads are green or red (green up for sell, green down for buy, so green indicates the price favors the player/blockhead). If tapped, a graph of the item's price over the past 24 hours will appear. | ||
===Job Listings=== | |||
{{See also|Job Listings}} | |||
The Job Listings button does not pull up the item exchange menu; instead it pulls up a list of available "jobs" that a blockhead may be assigned to. Each job is available for a limited time, may require a specified tool, and has both a specified duration and reward. The more advanced the tool and longer the job takes to complete, the larger and more valuable the reward tend to be. When a job's availability clock expires, it gets replaced with another. Only jobs the operating blockhead is properly equipped for may be accepted. Once a job is accepted, the blockhead will vanish, its inventory will become unavailable, and its status will change to a count-down of time remaining to complete the job (with an optional time crystal cost to complete immediately). The selected job will also become unavailable until the entry expires. When the job is complete, the working blockhead's status changes to a single button; tapping the button will make the blockhead reappear with the reward in their inventory. If a tool was required, it will show some wear. | |||
==Expert Mode== | |||
When playing in an [[Expert Mode]] world, crafting a trade portal requires a level 6 (diamond) portal. They can still be found in cave troll lairs. | |||
The primary difference in using a trade portal in expert mode is the cost of the upgrades, which is as follows: | |||
{{Bench|header}} | |||
{{Bench|up|2|Trade more advanced stuff.|10|Amethyst|50|Gold Coin|10|Time Crystal|image1=Trade Portal up Icon.png|Time2=0}} | |||
{{Bench|up|3|Trade more advanced stuff.|10|Sapphire|99|Gold Coin|20|Time Crystal|image1=Trade Portal up Icon.png|Time2=0}} | |||
{{Bench|up|4|Trade more advanced stuff.|10|Emerald|5|Platinum Coin|50|Time Crystal|image1=Trade Portal up Icon.png|Time2=0}} | |||
{{Bench|up|5|Trade more advanced stuff.|10|Ruby|20|Platinum Coin|100|Time Crystal|image1=Trade Portal up Icon.png|Time2=0}} | |||
{{Bench|up|6|Trade more advanced stuff.|10|Diamond|99|Platinum Coin|200|Time Crystal|image1=Trade Portal up Icon.png|Time2=0}} | |||
|} | |||
==Notes== | ==Notes== | ||
As it's possible to acquire [[Copper Coin|copper]] | As it's possible to acquire [[Copper Coin|copper]], [[Gold Coin|gold]] or [[Platinum Coin|platinum]] coins and even gems by finding [[Golden Chest|golden chests]] near the surface or [[meditation]], the introduction of trade portals allow for acquiring various important materials without [[Mining|digging]] deeply. [[Game updates/20180314|Version 1.7]] changes this by requiring the item to be found by other means before it can be bought or sold. | ||
For improved effectiveness when selling, pay attention to what can be crafted from raw materials and compare that with what the raw materials themselves will fetch. It is typically profitable to do a little crafting before trading | For improved effectiveness when selling, pay attention to what can be crafted from raw materials and compare that with what the raw materials themselves will fetch. It is typically profitable to do a little crafting before trading (for example, a [[chest]] will usually sell for more than a block of [[wood]]), but some may actually be worth less than selling the components directly. Items that require components that can be crafted will have multiple equivalences. A good understanding of these values can be used to profit from crafting, even if the components need to be purchased. The changes in buy/sell valuations introduced in version 1.7 strongly affect this arrangement. | ||
A look at [[Trade Portal#Mined Materials|the above lists]] reveals it's possible to buy a replacement for the gem used to upgrade a trade portal. Obtaining the gem in the first place requires the same old exploration or meditation methods, though. | A look at [[Trade Portal#Mined Materials|the above lists]] reveals it's possible to buy a replacement for the gem used to upgrade a trade portal. Obtaining the gem in the first place requires the same old exploration or meditation methods, though. | ||
[[Meditate|Meditation]] and the introduction of the trade portal has left the terms "[[Renewable Resource|renewable]]" and "[[Nonrenewable Resource|nonrenewable]]" somewhat irrelevant in context of the game. | In a multiplayer world, if a different player's blockhead is using a trade portal, the owner of the portal can not pick it up until the current user finishes. So if one person is on the trade portal and then exits to the main menu, the owner can't pick it up. | ||
[[Meditate|Meditation]] and the introduction of the trade portal has left the terms "[[Renewable Resource|renewable]]" and "[[Nonrenewable Resource|nonrenewable]]" resources somewhat irrelevant in context of the game. | |||
[[Category:Guide]] | [[Category:Guide]] | ||
[[Category:Item]] | [[Category:Item]] | ||
==Trivia== | |||
*Before 1.7, you could sell for 90% or 9/10th of the price of the item you bought | |||
Latest revision as of 23:09, 29 October 2024
| Trade Portal | |
|---|---|
 | |
|
| |
| Category | Crafting Surface |
| Use | Trading |
| Tool | |
| Stackable | Yes (99) |
- "Trade with the universe."
A trade portal is an object where many items can be bought and sold in exchange for currency. Prices reflect demand, with higher amounts of local influence and smaller amounts of universal influence on prices. They were introduced in version 1.5.
At any given moment at a given trade portal, items will sell there for 25% or 1/4th of the buying price at the same portal at that moment. As prices change and vary between trade portals, there can be trade portals with vastly different prices, allowing a profit to be made. Prices also change over time, so a price may go up or down as time passes. Buying items raises prices while selling items lowers prices.
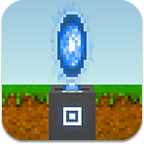
Appearance
A trade portal appears similarly to a portal, except with a golden tint. The trade portal's base block corresponds to the level of the trade portal, and is identical to the corresponding level for a portal.
Where Found

A trade portal can be crafted at a portal for one portal, one gold coin, and 50 time crystals. A trade portal may also be found when a cave troll is revealed (even in worlds started before version 1.5). Trade portals found near cave trolls will have different price offsets than a newly-crafted trade portal.
|
|
Upgrades
To buy more advanced items, a trade portal must be upgraded. Prior to version 1.6 and the introduction of platinum coins, the level 5 and level 6 upgrades cost 100 and 200 gold coins instead of 1 and 10 platinum coins, respectively. Upgrading in expert mode uses a different chart.
| Icon | Name | Slogan | Item 1 | Item 2 | Item 3 | Item 4 | Item 5 | Rush Cost | Double-Time |
|---|---|---|---|---|---|---|---|---|---|
| Level 2 Upgrade | Trade more advanced stuff. | 1 x |
10 x |
10 x |
0 |
0 | |||
| Level 3 Upgrade | Trade more advanced stuff. | 1 x |
20 x |
20 x |
0 |
0 | |||
| Level 4 Upgrade | Trade more advanced stuff. | 1 x |
50 x |
50 x |
0 |
0 | |||
| Level 5 Upgrade | Trade more advanced stuff. | 1 x |
1 x |
100 x |
0 |
0 | |||
| Level 6 Upgrade | Trade more advanced stuff. | 1 x |
10 x |
200 x |
0 |
0 |
Available Items
Most items are available through a trade portal. Other than those for electric production and conversion, crafting surfaces are not.
Beginning with version 1.7, trade portals do not show items for buying or selling that have not yet been "found" (picked up by a blockhead). For worlds created before 1.7, only those items introduced in that version will be unavailable. Unavailable items have question marks instead of icons.
| Trade Portal Item Categories |
|---|
| Icon | Item | Level |
|---|---|---|
| Dirt | Requires Level 1 | |
| Wood | Requires Level 1 | |
| Wood Column | Requires Level 1 | |
| Wood Stairs | Requires Level 1 | |
| Stone | Requires Level 1 | |
| Stone Column | Requires Level 1 | |
| Stone Stairs | Requires Level 1 | |
| Sand | Requires Level 1 | |
| Limestone | Requires Level 2 | |
| Limestone Column | Requires Level 2 | |
| Limestone Stairs | Requires Level 2 | |
| Sandstone | Requires Level 2 | |
| Sandstone Column | Requires Level 2 | |
| Sandstone Stairs | Requires Level 2 | |
| Marble | Requires Level 2 | |
| Marble Column | Requires Level 2 | |
| Marble Stairs | Requires Level 2 | |
| Red Bricks | Requires Level 2 | |
| Brick Column | Requires Level 2 | |
| Brick Stairs | Requires Level 2 | |
| Gravel | Requires Level 3 | |
| Black Sand | Requires Level 3 | |
| Compost | Requires Level 3 | |
| Plaster | Requires Level 3 | |
| File:Plaster Column Icon.png | Plaster Column | Requires Level 3 |
| File:Plaster Stairs Icon.png | Plaster Stairs | Requires Level 3 |
| Glass | Requires Level 3 | |
| Glass Column | Requires Level 2 | |
| Glass Stairs | Requires Level 2 | |
| Black Glass | Requires Level 3 | |
| Black Glass Column | Requires Level 2 | |
| Black Glass Stairs | Requires Level 2 | |
| Ice | Requires Level 3 | |
| Ice Column | Requires Level 3 | |
| Ice Stairs | Requires Level 3 | |
| Reinforced Platform | Requires Level 3 | |
| Lapis Lazuli | Requires Level 4 | |
| Lapis Lazuli Column | Requires Level 4 | |
| Lapis Lazuli Stairs | Requires Level 4 | |
| Red Marble | Requires Level 4 | |
| Red Marble Column | Requires Level 4 | |
| Red Marble Stairs | Requires Level 4 | |
| Basalt | Requires Level 4 | |
| Basalt Column | Requires Level 4 | |
| Basalt Stairs | Requires Level 4 | |
| Copper Block | Requires Level 5 | |
| Copper Column | Requires Level 5 | |
| Copper Stairs | Requires Level 5 | |
| Tin Block | Requires Level 5 | |
| Tin Column | Requires Level 5 | |
| Tin Stairs | Requires Level 5 | |
| Bronze Block | Requires Level 5 | |
| Bronze Column | Requires Level 5 | |
| Bronze Stairs | Requires Level 5 | |
| Iron Block | Requires Level 6 | |
| Iron Column | Requires Level 6 | |
| Iron Stairs | Requires Level 6 | |
| Steel Block | Requires Level 6 | |
| Steel Column | Requires Level 6 | |
| Steel Stairs | Requires Level 6 | |
| Gold Block | Requires Level 6 | |
| Gold Column | Requires Level 6 | |
| Gold Stairs | Requires Level 6 | |
| Carbon Fiber Block | Requires Level 6 | |
| Carbon Fiber Column | Requires Level 6 | |
| Carbon Fiber Stairs | Requires Level 6 | |
| Titanium Block | Requires Level 6 | |
| Titanium Column | Requires Level 6 | |
| Titanium Stairs | Requires Level 6 | |
| Platinum Block | Requires Level 6 | |
| Platinum Column | Requires Level 6 | |
| Platinum Stairs | Requires Level 6 | |
| Amethyst Block | Requires Level 6 | |
| File:Amethyst Column Icon.png | Amethyst Column | Requires Level 6 |
| File:Amethyst Stairs Icon.png | Amethyst Stairs | Requires Level 6 |
| Sapphire Block | Requires Level 6 | |
| File:Sapphire Column Icon.png | Sapphire Column | Requires Level 6 |
| File:Sapphire Stairs Icon.png | Sapphire Stairs | Requires Level 6 |
| Emerald Block | Requires Level 6 | |
| File:Emerald Column Icon.png | Emerald Column | Requires Level 6 |
| File:Emerald Stairs Icon.png | Emerald Stairs | Requires Level 6 |
| Ruby Block | Requires Level 6 | |
| File:Ruby Column Icon.png | Ruby Column | Requires Level 6 |
| File:Ruby Stairs Icon.png | Ruby Stairs | Requires Level 6 |
| Diamond Block | Requires Level 6 | |
| File:Diamond Column Icon.png | Diamond Column | Requires Level 6 |
| File:Diamond Stairs Icon.png | Diamond Stairs | Requires Level 6 |
| Luminous Plaster | Requires Level 6 |
| Trade Portal Item Categories |
|---|
| Icon | Item | Level |
|---|---|---|
| Stick | Requires Level 1 | |
| Worm | Requires Level 1 | |
| Pine Cone | Requires Level 1 | |
| Apple | Requires Level 2 | |
| Mango | Requires Level 2 | |
| Maple Seed | Requires Level 2 | |
| Prickly Pear | Requires Level 2 | |
| Coconut | Requires Level 2 | |
| Flax Seed | Requires Level 2 | |
| Orange | Requires Level 2 | |
| Lime | Requires Level 2 | |
| Sunflower Seed | Requires Level 2 | |
| Corn | Requires Level 2 | |
| Carrot | Requires Level 2 | |
| Cherry | Requires Level 2 | |
| Chilli | Requires Level 2 | |
| Wheat | Requires Level 2 | |
| Tomato | Requires Level 2 | |
| Kelp | Requires Level 3 | |
| Flax | Requires Level 3 | |
| Vine | Requires Level 3 | |
| Dodo Egg | Requires Level 3 | |
| Dodo Feather | Requires Level 3 | |
| Raw Dodo Meat | Requires Level 3 | |
| Raw Fish | Requires Level 3 | |
| Leather | Requires Level 4 | |
| Fur | Requires Level 4 | |
| Coffee Cherry | Requires Level 4 | |
| Flour | Requires Level 4 | |
| Yeast | Requires Level 4 | |
| Salt | Requires Level 4 | |
| Milk | Requires Level 4 | |
| Yak Horn | Requires Level 4 | |
| Yak Shavings | Requires Level 4 | |
| Cooked Dodo Meat | Requires Level 5 | |
| Cooked Fish | Requires Level 5 | |
| Green Coffee Bean | Requires Level 5 | |
| Dough | Requires Level 5 | |
| Mozzarella | Requires Level 5 | |
| Roasted Coffee Bean | Requires Level 6 | |
| Coffee | Requires Level 6 | |
| Fish Curry | Requires Level 6 | |
| Dodo Stew | Requires Level 6 | |
| Poison | Requires Level 6 | |
| Bread | Requires Level 6 | |
| File:Flatbread Icon.png | Flatbread | Requires Level 6 |
| Pizza | Requires Level 6 | |
| Rainbow Essence | Requires Level 6 | |
| Rainbow Cake | Requires Level 6 |
| Trade Portal Item Categories |
|---|
| Icon | Item | Level |
|---|---|---|
| Flint Spade | Requires Level 1 | |
| Flint Axe | Requires Level 1 | |
| Flint Spear | Requires Level 1 | |
| Flint Pickaxe | Requires Level 1 | |
| Flint Machete | Requires Level 1 | |
| Stone Spade | Requires Level 2 | |
| Stone Axe | Requires Level 2 | |
| Stone Pickaxe | Requires Level 2 | |
| Copper Bow & Arrows | Requires Level 3 | |
| Tin Spade | Requires Level 3 | |
| Bronze Pickaxe | Requires Level 3 | |
| Bronze Machete | Requires Level 3 | |
| Bronze Sword | Requires Level 3 | |
| Iron Pickaxe | Requires Level 4 | |
| Iron Machete | Requires Level 4 | |
| Iron Sword | Requires Level 4 | |
| Iron Axe | Requires Level 4 | |
| Crowbar | Requires Level 5 | |
| Steel Pickaxe | Requires Level 5 | |
| Razor | Requires Level 5 | |
| Gold Spade | Requires Level 6 | |
| Gold Pickaxe | Requires Level 6 | |
| Titanium Sword | Requires Level 4 | |
| Titanium Pickaxe | Requires Level 6 | |
| Gold Bow & Poison Arrows | Requires Level 6 |
| Trade Portal Item Categories |
|---|
| Icon | Item | Level |
|---|---|---|
| Linen Cap | Requires Level 1 | |
| Linen Brimmed Hat | Requires Level 1 | |
| Linen Shirt | Requires Level 1 | |
| Linen Pants | Requires Level 1 | |
| Leather Jacket | Requires Level 2 | |
| Leather Pants | Requires Level 2 | |
| Leather Boots | Requires Level 2 | |
| Fur Coat | Requires Level 3 | |
| Fur Boots | Requires Level 3 | |
| Tin Foil Hat | Requires Level 3 | |
| Tin Helmet | Requires Level 4 | |
| Tin Chest Plate | Requires Level 4 | |
| Tin Armor Leggings | Requires Level 4 | |
| Tin Boots | Requires Level 4 | |
| Iron Helmet | Requires Level 5 | |
| Iron Chest Plate | Requires Level 5 | |
| Iron Armor Leggings | Requires Level 5 | |
| Iron Boots | Requires Level 5 | |
| Ice Helmet | Requires Level 6 | |
| Ice Chest Plate | Requires Level 6 | |
| Ice Armor Leggings | Requires Level 6 | |
| Ice Boots | Requires Level 6 | |
| Carbon Fiber Helmet | Requires Level 6 | |
| Carbon Fiber Chest Plate | Requires Level 6 | |
| Carbon Fiber Leggings | Requires Level 6 | |
| Carbon Fiber Boots | Requires Level 6 | |
| Titanium Helmet | Requires Level 6 | |
| Titanium Chest Plate | Requires Level 6 | |
| Titanium Leggings | Requires Level 6 | |
| Titanium Boots | Requires Level 6 |
| Trade Portal Item Categories |
|---|
| Icon | Item | Level |
|---|---|---|
| Flint | Requires Level 1 | |
| Clay | Requires Level 1 | |
| Oil | Requires Level 1 | |
| Coal | Requires Level 2 | |
| Copper Ore | Requires Level 2 | |
| Tin Ore | Requires Level 2 | |
| Iron Ore | Requires Level 2 | |
| Amethyst Shard | Requires Level 2 | |
| Amethyst | Requires Level 2 | |
| Gold Nugget | Requires Level 3 | |
| Copper Ingot | Requires Level 3 | |
| Tin Ingot | Requires Level 3 | |
| Sapphire Shard | Requires Level 3 | |
| Sapphire | Requires Level 3 | |
| Crushed Limestone | Requires Level 4 | |
| Pig Iron | Requires Level 4 | |
| Bronze Ingot | Requires Level 4 | |
| Emerald Shard | Requires Level 4 | |
| Emerald | Requires Level 4 | |
| Platinum Nugget | Requires Level 5 | |
| Titanium Ore | Requires Level 5 | |
| Iron Ingot | Requires Level 5 | |
| Ruby Shard | Requires Level 5 | |
| Ruby | Requires Level 5 | |
| Steel Ingot | Requires Level 6 | |
| Gold Ingot | Requires Level 6 | |
| Silicon Ingot | Requires Level 6 | |
| Silicon Crystal | Requires Level 6 | |
| Silicon Wafer | Requires Level 6 | |
| Platinum Ingot | Requires Level 6 | |
| Titanium Ingot | Requires Level 6 | |
| Diamond Shard | Requires Level 6 | |
| Diamond | Requires Level 6 |
| Trade Portal Item Categories |
|---|
| Icon | Item | Level |
|---|---|---|
| Basket | Requires Level 1 | |
| Ember | Requires Level 1 | |
| Charcoal | Requires Level 1 | |
| Basic Torch | Requires Level 1 | |
| Chest | Requires Level 2 | |
| Wooden Door | Requires Level 2 | |
| Trapdoor | Requires Level 2 | |
| Ladder | Requires Level 2 | |
| Window | Requires Level 2 | |
| Shelf | Requires Level 2 | |
| Sign | Requires Level 2 | |
| Wooden Bed | Requires Level 2 | |
| Wooden Gate | Requires Level 2 | |
| Soft Bed | Requires Level 3 | |
| String | Requires Level 3 | |
| Oil Lantern | Requires Level 3 | |
| Carrot On A Stick | Requires Level 3 | |
| Cup | Requires Level 3 | |
| Linen | Requires Level 3 | |
| Tin Bucket | Requires Level 3 | |
| Boat | Requires Level 3 | |
| Camera | Requires Level 3 | |
| Tin Foil | Requires Level 3 | |
| Fishing Rod | Requires Level 3 | |
| Cage | Requires Level 3 | |
| Bucket Of Water | Requires Level 4 | |
| Steel Lantern | Requires Level 4 | |
| Steel Downlight | Requires Level 4 | |
| Steel Uplight | Requires Level 4 | |
| Iron Pot | Requires Level 4 | |
| Indian Yellow | Requires Level 4 | |
| Red Ochre | Requires Level 4 | |
| Ultramarine Blue | Requires Level 4 | |
| Carbon Black | Requires Level 4 | |
| Marble White | Requires Level 4 | |
| Emerald Green | Requires Level 4 | |
| Tyrian Purple | Requires Level 4 | |
| Copper Blue | Requires Level 4 | |
| Mirror | Requires Level 4 | |
| Golden Chest | Requires Level 5 | |
| Feeder Chest | Requires Level 5 | |
| Safe | Requires Level 5 | |
| Iron Door | Requires Level 5 | |
| Iron Trapdoor | Requires Level 5 | |
| Black Window | Requires Level 5 | |
| Display Cabinet | Requires Level 5 | |
| Fish Bucket | Requires Level 5 | |
| Shark Bucket | Requires Level 5 | |
| Ice Torch | Requires Level 5 | |
| Amethyst Chandelier | Requires Level 6 | |
| Sapphire Chandelier | Requires Level 6 | |
| Emerald Chandelier | Requires Level 6 | |
| Ruby Chandelier | Requires Level 6 | |
| Diamond Chandelier | Requires Level 6 |
| Trade Portal Item Categories |
|---|
| Icon | Item | Level |
|---|---|---|
| Copper Boiler | Requires Level 5 | |
| Magnet | Requires Level 5 | |
| Electric Motor | Requires Level 5 | |
| Copper Wire | Requires Level 5 | |
| Steam Engine | Requires Level 6 | |
| Steam Generator | Requires Level 6 | |
| Solar Panel | Requires Level 6 | |
| Flywheel | Requires Level 6 | |
| Elevator Shaft | Requires Level 6 | |
| Electric Elevator Motor | Requires Level 6 | |
| Rail | Requires Level 6 | |
| Train Wheel | Requires Level 6 | |
| Rail Handcar | Requires Level 6 | |
| Steam Locomotive | Requires Level 6 | |
| Freight Car | Requires Level 6 | |
| Passenger Car | Requires Level 6 | |
| Fuel | Requires Level 6 | |
| Raw Resin | Requires Level 6 | |
| Epoxy | Requires Level 6 | |
| Carbon Fibers | Requires Level 6 | |
| Carbon Fiber Sheet | Requires Level 6 | |
| Carbon Fiber Wing | Requires Level 6 | |
| Jetpack Chassis | Requires Level 6 | |
| Jet Engine | Requires Level 6 | |
| Jetpack | Requires Level 6 |
| Trade Portal Item Categories |
|---|
| Icon | Trade |
|---|---|
| Trade 100 Gold Coins for 1 Platinum Coin | |
| Trade 1 Platinum Coin for 100 Gold Coins | |
| Trade 100 Copper Coins for 1 Gold Coin | |
| Trade 1 Gold Coin for 100 Copper Coins |
It may be important to recognize that not all items can be bought or sold through a trade portal. These include:
- Any crafting surface usable to make items
- Portals, trade portals, and portal chests
- Any dyed item
- Paint and paint stripper
- Paintings
- Train stations
- Reward clothing
- Shark jaws
- Tulip seeds and bulbs
- Time crystals
- Shops
Removed Items
On 13 October, 2015, the following items were removed from the trade portal and became unable to be purchased or sold. All of the items removed cost time crystals to craft.
| Icon | Item | Level |
|---|---|---|
| Amethyst Pickaxe | Requires Level 2 | |
| Sapphire Pickaxe | Requires Level 3 | |
| Emerald Pickaxe | Requires Level 4 | |
| Ruby Pickaxe | Requires Level 5 | |
| Diamond Pickaxe | Requires Level 6 | |
| Golden Bed | Requires Level 6 |
At the same time, a notable change in prices was observed, making it more difficult to become wealthy via manufacturing.
Blockmarket

The Blockmarket website was opened to the public on 11 August 2014. The defunct website, located at http://blockmarket.theblockheads.net, rebuilt at https://wiki.floofyplasma.com/Blockmarket, shows the current global prices to buy an item in gold coins at trade portals. It also shows the percent change since 24 hours ago, being red if the price has gone down and green if the price has gone up. Clicking on an item's name shows a graph of the price for the last 24 hours.
As described on their "What is this?" page:
"In The Blockheads, there are 'trade portals' which allow players to buy and sell most in-game items on a global marketplace. Every time a player buys an item, the global price rises a little, and every time they sell an item, the price falls. This website displays the current global prices for the in-game economy."
Using


The trade portal has three options when tapped: Remove, Buy, and Sell. Version 1.7 introduced Job Listings.
A blockhead cannot buy, sell, or otherwise use the interface until they have reached the trade portal. At that time, the trade portal interface (shown to the right) will open.
The icon menu across the top, immediately below the window title, can be scrolled left and right. Selecting an icon will display the trade menu associated with it: blocks, food, tools, clothing, mined materials, miscellaneous, advanced items, and coins (exchange). (See above for a detailed list.) The final icon is for upgrades.
The trade menus can be scrolled up and down. Each line shows the item (and quantity), cost (in platinum, gold and copper coins), and a button to sell or buy based on what was chosen when the trade portal was tapped. The buy/sell button will be green if the using blockhead has the necessary items in its inventory. Items unavailable at the trade portal's current level show a "locked" icon and have no cost or buy/sell button.
Tapping a buy/sell button executes that exchange once but does not close the interface. To close the interface, tap outside its window. Transactions are instantaneous and cannot (or need to) be rushed by spending time crystals or aborted.
When buying items, a blockhead will automatically have coins exchanged to make the necessary purchase, with the remaining change being given back to that blockhead. When selling items, coins will not be exchanged automatically and may overflow out of a blockhead's inventory.
The acts of buying and selling affect the listed prices for that item, although the results may not be visible until multiples of the item have been traded. Buying will cause a price increase, while selling will cause a price decrease. Items going for less than one copper coin each will be listed as multiples of the item, indicated by a number superimposed over its icon. Item listings can switch between singles and multiples as appropriate. The passage of time may also cause some prices to change as other players buy and sell items.
Beginning with version 1.5.1, an icon on each item line shows single or double arrowheads up or down or a horizontal line. These associate the listed price with an unspecified standard and indicate whether it is high, low, or normal. The arrowheads are green or red (green up for sell, green down for buy, so green indicates the price favors the player/blockhead). If tapped, a graph of the item's price over the past 24 hours will appear.
Job Listings
- See also: Job Listings
The Job Listings button does not pull up the item exchange menu; instead it pulls up a list of available "jobs" that a blockhead may be assigned to. Each job is available for a limited time, may require a specified tool, and has both a specified duration and reward. The more advanced the tool and longer the job takes to complete, the larger and more valuable the reward tend to be. When a job's availability clock expires, it gets replaced with another. Only jobs the operating blockhead is properly equipped for may be accepted. Once a job is accepted, the blockhead will vanish, its inventory will become unavailable, and its status will change to a count-down of time remaining to complete the job (with an optional time crystal cost to complete immediately). The selected job will also become unavailable until the entry expires. When the job is complete, the working blockhead's status changes to a single button; tapping the button will make the blockhead reappear with the reward in their inventory. If a tool was required, it will show some wear.
Expert Mode
When playing in an Expert Mode world, crafting a trade portal requires a level 6 (diamond) portal. They can still be found in cave troll lairs.
The primary difference in using a trade portal in expert mode is the cost of the upgrades, which is as follows:
| Icon | Name | Slogan | Item 1 | Item 2 | Item 3 | Item 4 | Item 5 | Rush Cost | Double-Time |
|---|---|---|---|---|---|---|---|---|---|
| Level 2 Upgrade | Trade more advanced stuff. | 10 x |
50 x |
10 x |
0 |
0 | |||
| Level 3 Upgrade | Trade more advanced stuff. | 10 x |
99 x |
20 x |
0 |
0 | |||
| Level 4 Upgrade | Trade more advanced stuff. | 10 x |
5 x |
50 x |
0 |
0 | |||
| Level 5 Upgrade | Trade more advanced stuff. | 10 x |
20 x |
100 x |
0 |
0 | |||
| Level 6 Upgrade | Trade more advanced stuff. | 10 x |
99 x |
200 x |
0 |
0 |
Notes
As it's possible to acquire copper, gold or platinum coins and even gems by finding golden chests near the surface or meditation, the introduction of trade portals allow for acquiring various important materials without digging deeply. Version 1.7 changes this by requiring the item to be found by other means before it can be bought or sold.
For improved effectiveness when selling, pay attention to what can be crafted from raw materials and compare that with what the raw materials themselves will fetch. It is typically profitable to do a little crafting before trading (for example, a chest will usually sell for more than a block of wood), but some may actually be worth less than selling the components directly. Items that require components that can be crafted will have multiple equivalences. A good understanding of these values can be used to profit from crafting, even if the components need to be purchased. The changes in buy/sell valuations introduced in version 1.7 strongly affect this arrangement.
A look at the above lists reveals it's possible to buy a replacement for the gem used to upgrade a trade portal. Obtaining the gem in the first place requires the same old exploration or meditation methods, though.
In a multiplayer world, if a different player's blockhead is using a trade portal, the owner of the portal can not pick it up until the current user finishes. So if one person is on the trade portal and then exits to the main menu, the owner can't pick it up.
Meditation and the introduction of the trade portal has left the terms "renewable" and "nonrenewable" resources somewhat irrelevant in context of the game.
Trivia
- Before 1.7, you could sell for 90% or 9/10th of the price of the item you bought